Pongu lumpia is a special invention made for the Pongu Pongu snack stand in Pandora at Disney World’s Animal Kingdom. Pandora is from the Avatar film, and the park expansion is supposed to look like the alien planet in the future, where humans and the Na’vi are at peace.
So, we brought this future version of Filipino food with us. Lumpia is like an egg roll, and they are fantastic on their own. Here, instead of a savory pork and cabbage filling, they are a dessert.
These pongu lumpia are filled with creme cheese and pineapple. The curveballs don’t end there. The filling is still cold while the outside is crunchy and warm! I’ll show you how to make this happen.
Making The Pongu Lumpia
This recipe can be made super easy if you use premade egg roll wrappers, so I decided to make my own for some fun. You have to admit, they came out looking perfect! I’ll tell you how to make the wrappers too, if you choose to accept this mission.
Making The Wrappers
This wrapper recipe is surprisingly simple! The only ingredients are: all-purpose flour, water, cornstarch, and salt. Mix them together, knead the dough, and rest it in the fridge for 20 minutes. This makes the dough less sticky. Also, it will be easier to roll out. Finally, form the lumpia wrapper dough into a snake.
Now, cut the snake into 10 equal sections. Roll each out into a flat disc. Brush with a tiny bit of oil and dust with flour. Stack the discs into equal stacks of 5.
Next, precook the pongu lumpia wrappers. This makes them more sturdy and easy to roll. Cook 5 wrappers in a stack at one time, just like in my cheeseburger spring roll recipe. Cook for 1 minute, then flip the stack and cook for 1 more minute. Don’t make them crispy!
What Kind of Flour for The Wrappers?
All-purpose flour works best here. Personally, I don’t think it matters whether it’s bleached or not. I would stay away from self-rising flour. That might lead to unwanted bubbles in the pongu lumpia wrappers.

Final Steps
First, fill the wrapper with a mixture of pineapple and cream cheese. I used fresh pineapple, but canned works as well. Fold in the top and bottom. Roll it from one side like a sleeping bag, wet the flap at the end and close it.
Once you fill all the wrappers, put them in the freezer for at least 2 hours. This is what gives the pongu lumpia that distinctive cool center. Whenever you feel like it, you can take them out and pan fry them for a few minutes.
The freezer should make the wrappers stay closed, so you can fry without fear of the rolls spilling open. If they are coming open, try frying them flap side down first.
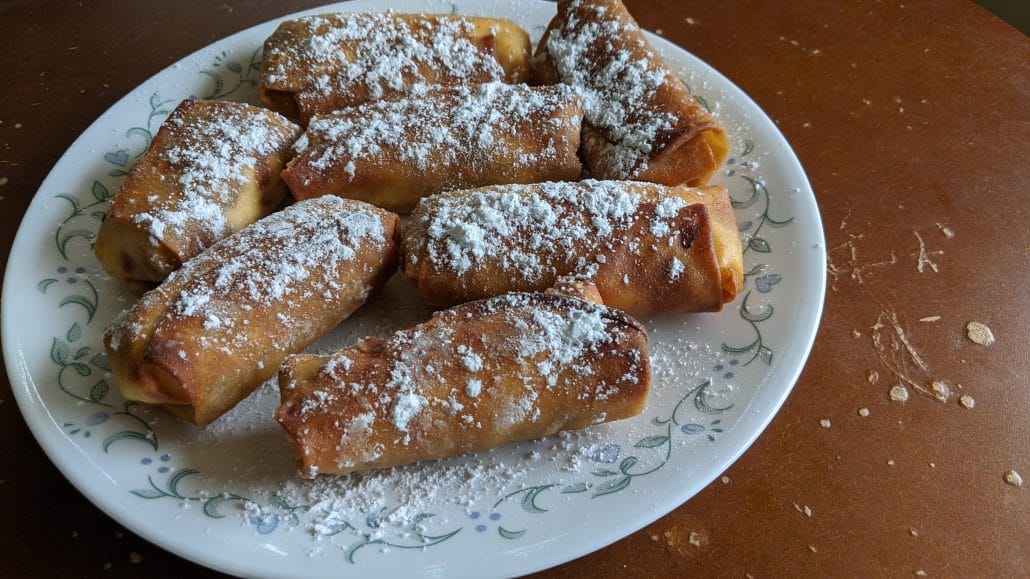
After frying, dust the lumpia with some powdered sugar and they are ready to eat!
How Does Pongu Lumpia Taste?
People feel divided on pongu lumpia. You either love them or you hate them. I understand it. The hot and cold contrast in the same dish is surprising, but I think it works. I dare say it’s delicious!
The filling is creamy and fruity. You could leave off the extra sugar and it would be an appetizer, but it works best as a dessert with the sugar. Why are they made this way? They represent the future!
For another fried theme park recipe, try out my apple fries from Legoland! If you like eating things inside of other things, check out my dumpling guide with over 100 recipes!

Pongu Lumpia
Ingredients
Method
- Mix flour, water, and salt. Knead and rest in fridge for 20 minutes. Roll into a snake. Cut dough into 10 equal sections.
- Roll out each section into a 3-4 inch diameter disc. Lightly brush with oil and dust with flour. Stack the discs on top of each other in 2 piles of 5.
- Heat a skillet on medium heat. Cook each stack of wrappers, one minute on the bottom, flip stack and cook top for 1 minute. They shouldn't get crispy at all.
- Take a spoon of cream cheese and spread it across the wrapper.
- Sprinkle pineapple on top of cream cheese. Sprinkle sugar to taste as well.
- Fold in the top and bottom of wrapper. Roll from one side to the other, like a sleeping bag. Seal with water along the edge. Repeat with all the wrappers.
- Cover pongu lumpia and put in the freezer for at least 3 hours.
- Take them out and pan fry the lumpia, starting fold side down, for about 3 minutes, then turn and fry for 3 minutes or until golden brown. Repeat until all lumpia are done.
- Dust the top with powdered sugar and enjoy!
Leave a Reply